
Most gaskets look alike once they have been squashed in a frame for years. Three quick checks will get you the right one first time: where it is fitted, what shape it is, and the size of the part that pushes into the groove. Then match it against our profile drawings, with sizes.
Where is the seal fitted?
Open the window or door and find the seal that has failed. Where it sits tells you which family it belongs to.
Or start from your window or door
| Window or door | Weather seal (opening part to frame) | Glazing gasket (around the glass) |
|---|---|---|
| Casement window (uPVC or aluminium) | Bubble, flipper or Q-Lon | E gasket plus a wedge |
| Tilt & turn window | Bubble, flipper or Q-Lon | E gasket plus a wedge |
| uPVC front or back door | Bubble, flipper or Q-Lon, plus a threshold seal at the bottom | E gasket plus a wedge |
| Sliding patio door | – | U-channel around the glass unit |
| Bi-fold door | Made for the door system: see bi-fold door gaskets | |
| Timber window or door | Aquamac, Q-Lon or timber seals | – |
What shape is it?
Pull a short piece out (a corner or the joint is the easiest place to start) and look at the cut end. The shape of that end is what identifies it, not how it looks while fitted.
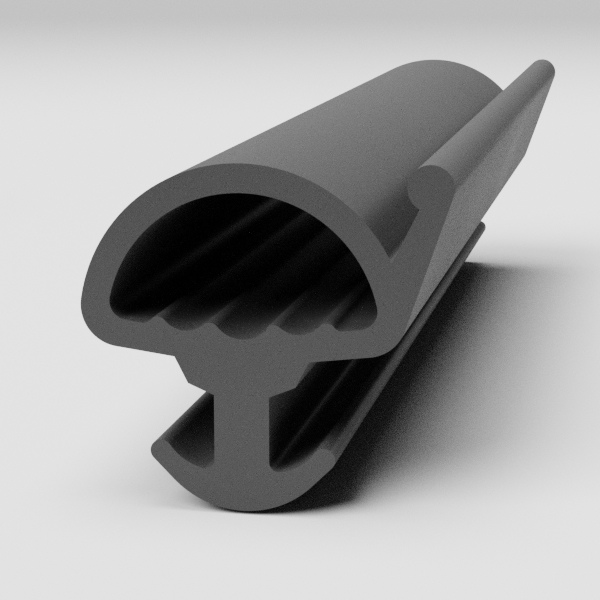
Bubble gasket
Weather seal
- A hollow, rounded tube on top of a leg
- Squashes flat when you press it
- Common on uPVC and aluminium windows and doors
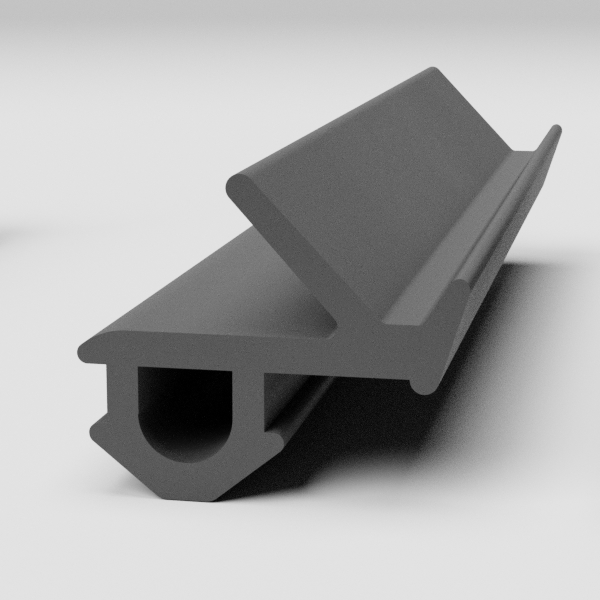
Flipper gasket
Weather seal
- A thin fin or lip that bends over
- Seals the opening part against the frame
- Not a swap for a bubble: keep the type you have
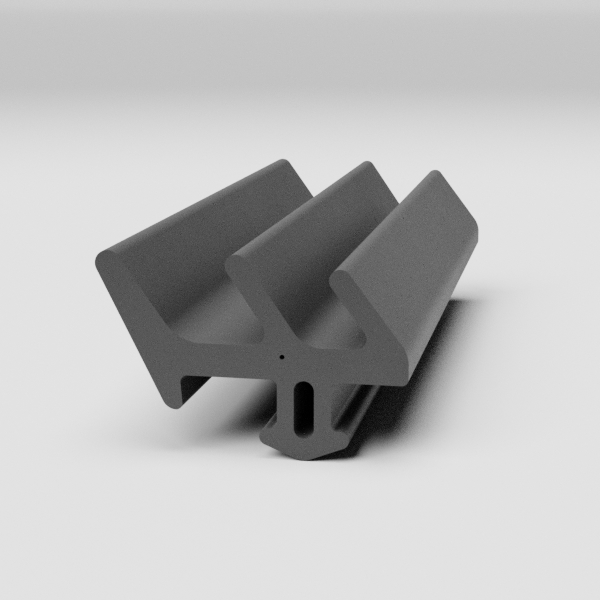
E gasket (fir tree)
Glazing gasket
- Flat face against the glass, ribbed "fir tree" leg below
- Its leg pushes into a groove in the frame or the glazing bead
- Seals one side of the glass, usually with a wedge gasket on the other side
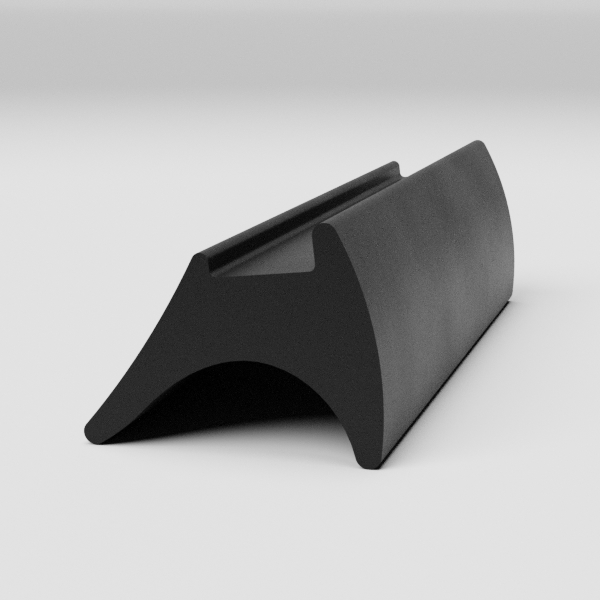
Wedge gasket
Glazing gasket
- Pushed in between the glass and the frame or glazing bead
- Holds the glass tight and keeps the rain out
- Five styles: standard, corded, tear-off, incremental and Reddilock
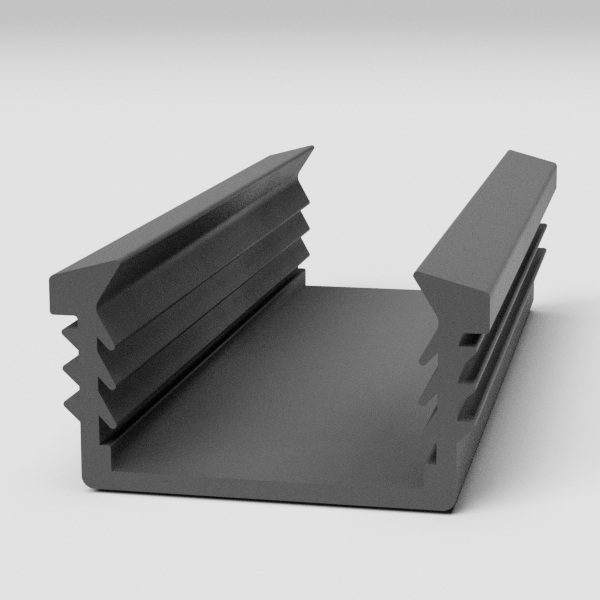
U-channel gasket
Patio doors
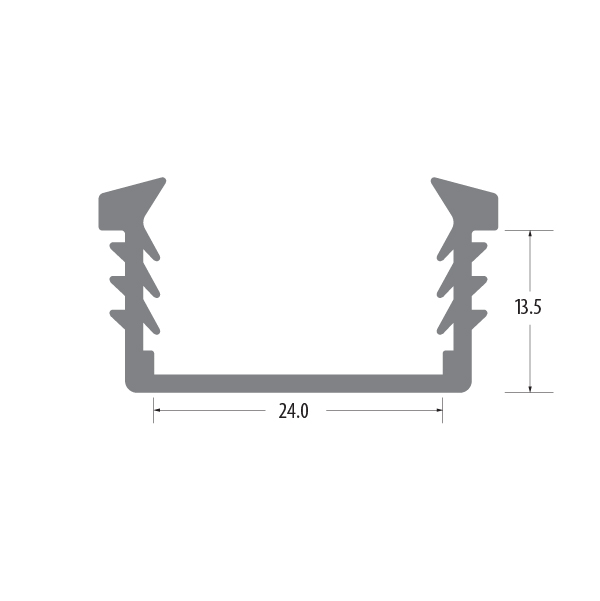
- A U shape that wraps round the edge of the glass unit
- Found on sliding patio doors
- Check the inside width of the U against your glass
Q-Lon, Aquamac & timber seals
Foam and timber seals
- Q-Lon: soft foam with a smooth outer skin, used on some uPVC windows and doors as well as wooden ones
- Aquamac and timber seals: made for wooden frames
- Most push into a slot, so check the slot width as well as the seal; some are self-adhesive
Not a window or glazing seal? For the bottom of a door see threshold door seals and draught excluders and brush seals. For fire doors see intumescent seals.
Some windows have co-extruded seals
On many newer uPVC windows the seal is made at the same time as the frame, sash or glazing bead, so the rubber is fused to the plastic instead of being pushed into a groove.
How to tell: there is no loose end or join to pull, and when you tug gently the seal stays firmly attached along its whole length. It can also be a different colour to a push-in gasket, such as grey.
Can it be replaced? Sometimes. Some frames have a groove under the co-extruded seal. If yours does, you can cut the old seal off with a sharp blade and push a standard replacement gasket into the groove, measured as in Step 3.
Check before you cut: not every window has a groove, and once a co-extruded seal is cut off it cannot be put back. If there is no groove, a push-in gasket will not fit. If you are not sure, send us a photo first.
If the window is draughty, check it is closing tightly first, as adjusting the keeps or cams often closes the gap.
Not sure which you have? Send us a photo looking straight at a cut end of the gasket, and we will tell you.
Measure it
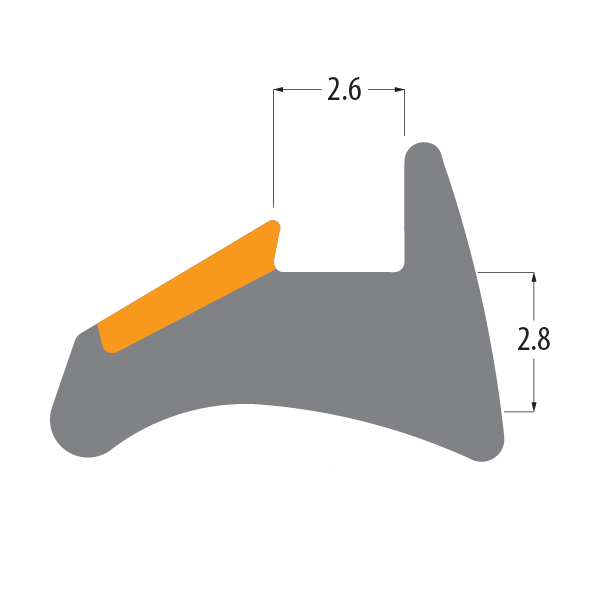
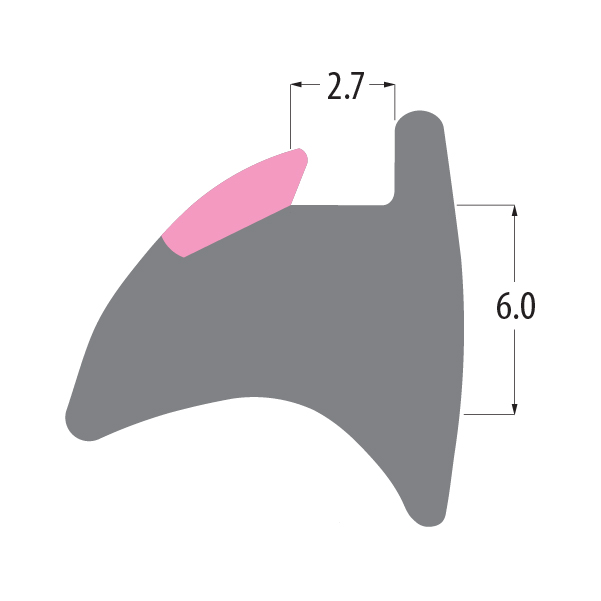
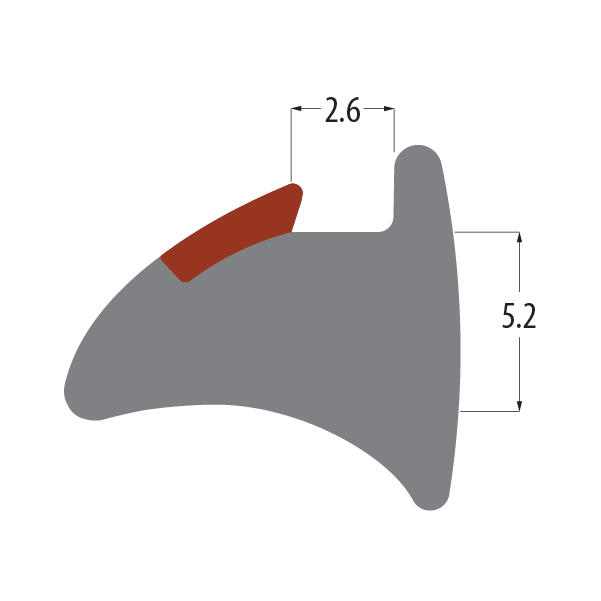
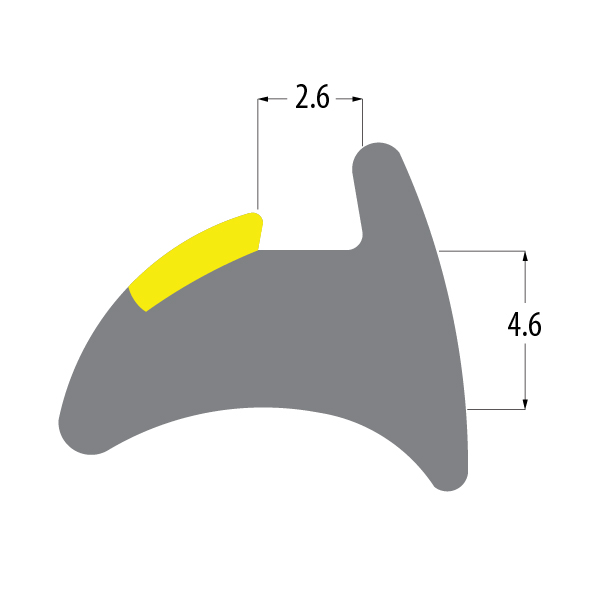
Each type is measured a little differently. Find yours below, then compare your sizes with the profile drawings in Step 4, which are in millimetres.
Bubble, flipper and foam seals
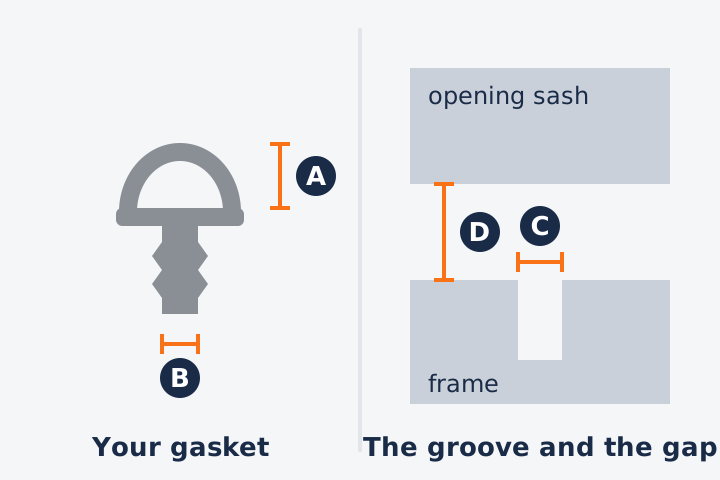
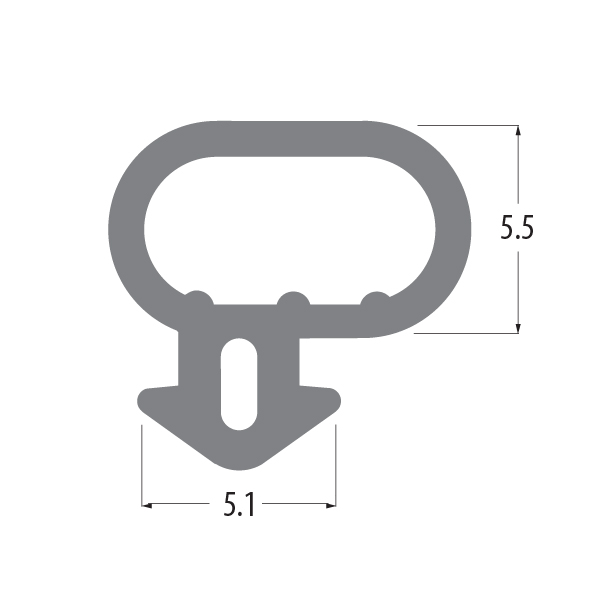
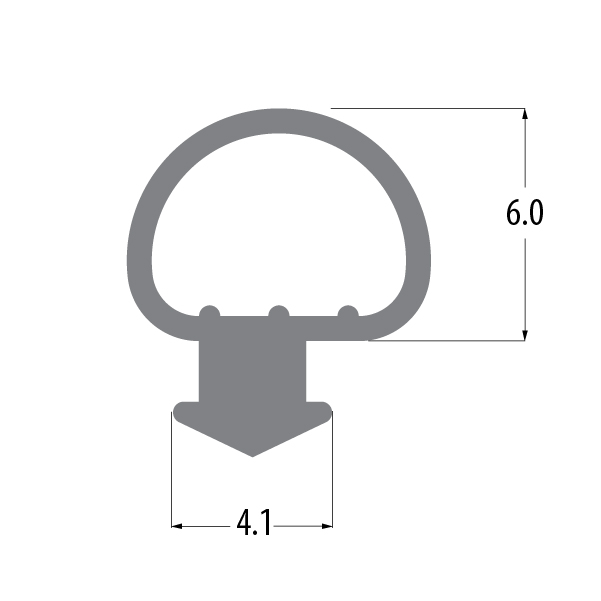
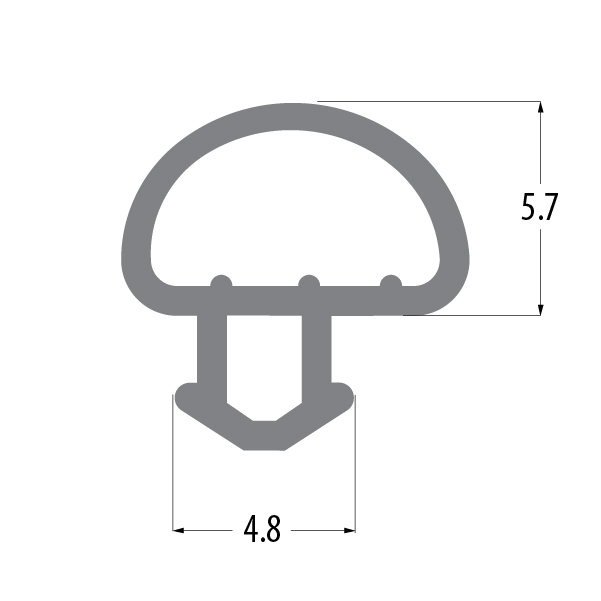
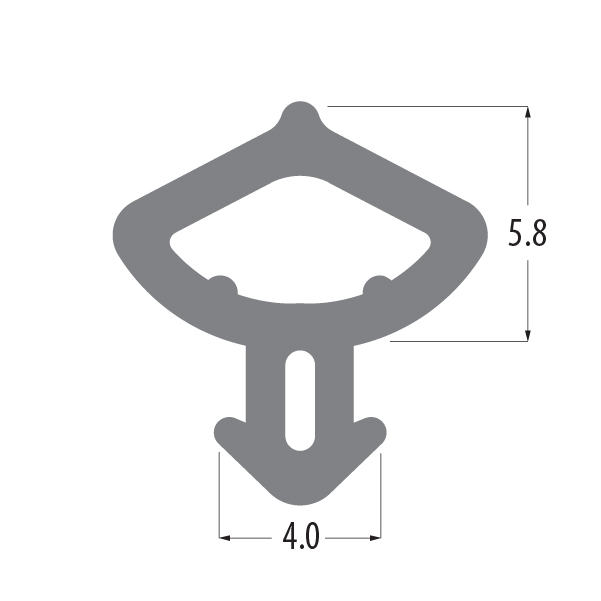
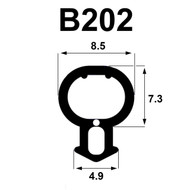
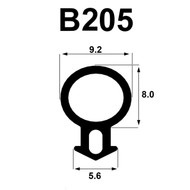
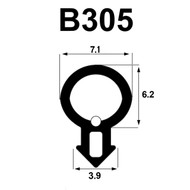
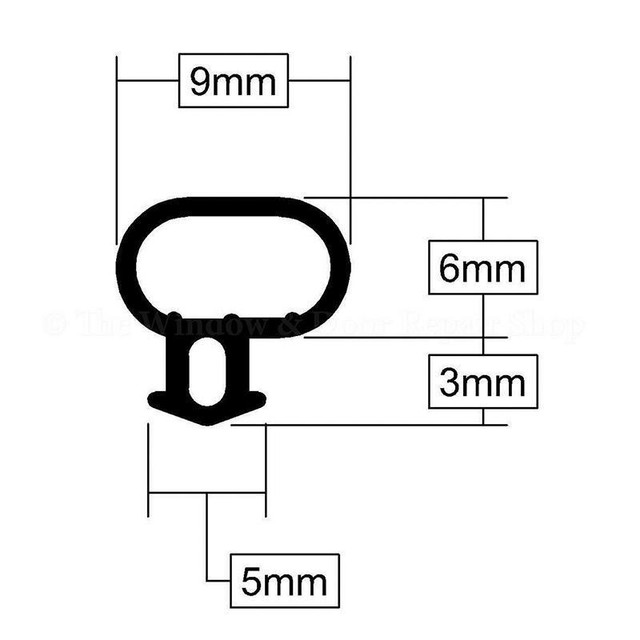
- AHeight. From the flat base to the top of the bubble, or to the tip of the flipper.
- BLeg. The width of the part that pushes into the groove. This matters most: if the leg is wrong, the seal will not stay in.
- CGroove. The width of the slot in the frame. If the old seal has perished, measure this instead of the leg.
- DThe gap. With the old seal out, close the window and measure the gap between the opening part and the frame. Can't get a ruler in? Press a small ball of Blu Tack onto the frame, close and lock the window, then measure how thin it has been squashed.
Rule of thumb: pick a bubble or flipper about a third taller than the gap. A 6 mm gap suits a seal around 8 mm high.
E gaskets
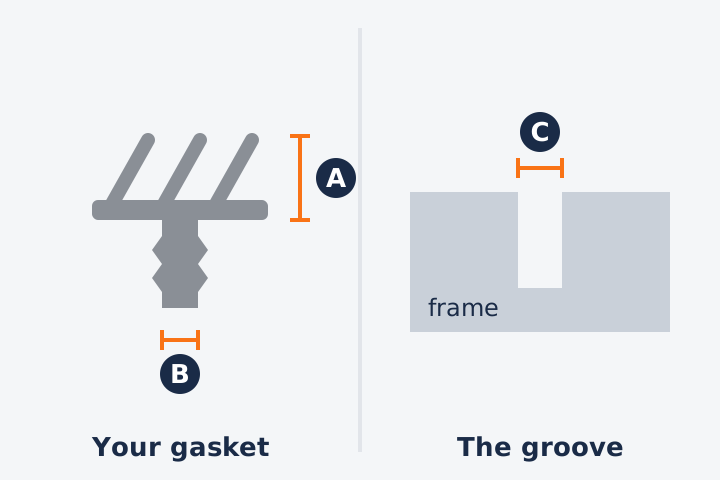
- AHeight. From the top of the leg to the top of the gasket. Once fitted it should sit flush with the top of the frame: too small sits low, too big sits proud and can let water in.
- BLeg. The width of the ribbed leg.
- CGroove. The width of the slot in the frame. If the old gasket has perished, measure this instead of the leg.
An E gasket sits between the glass and the frame or bead, so changing one can mean taking the glass or bead out.
Wedge gaskets
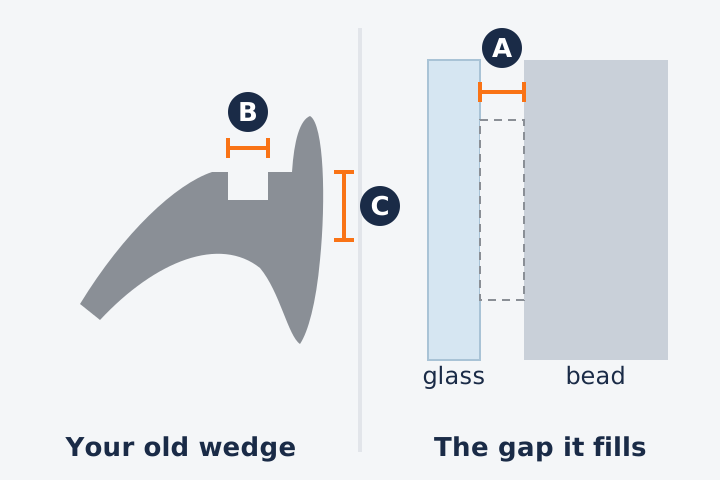
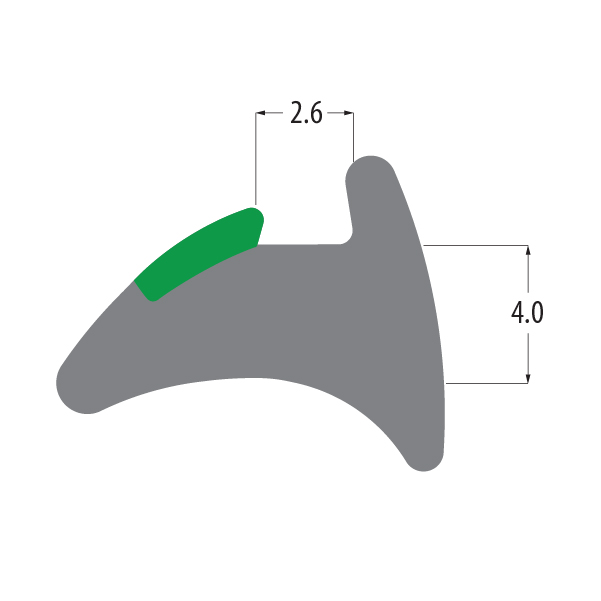
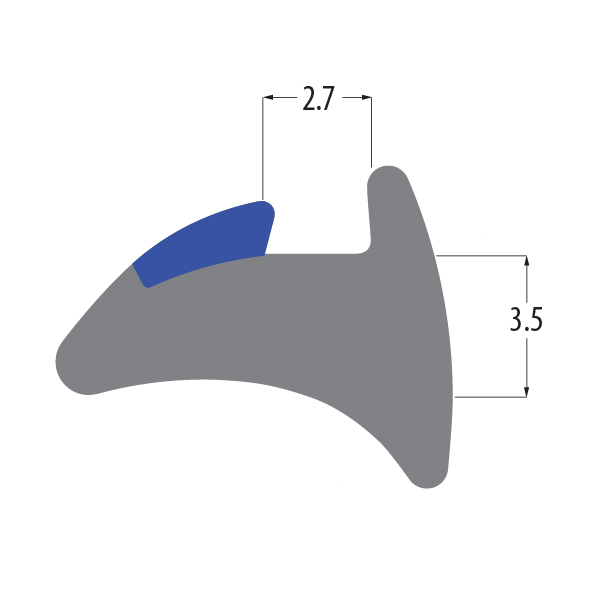
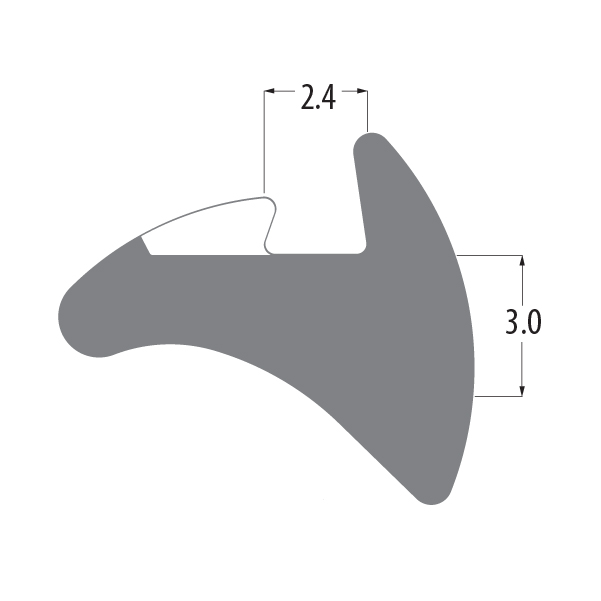
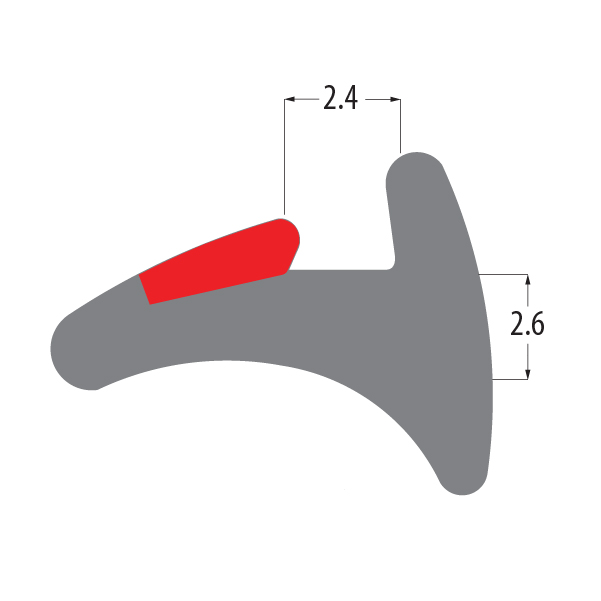
- AThe gap. Pull out a short length of the old wedge from one side only, then measure the gap between the glass and the frame or bead. Take out too much and the glass can shift and close the gap up. Feeler gauges are best; drill bits make a handy gauge.
- BThe notch. The width of the notch along the top of your old wedge.
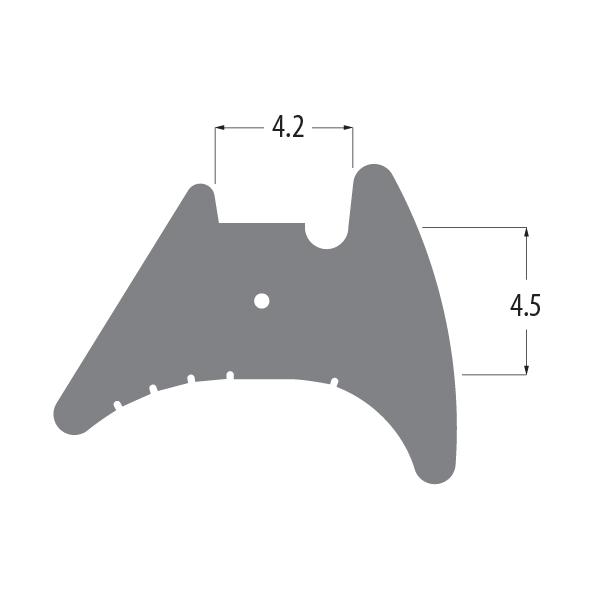
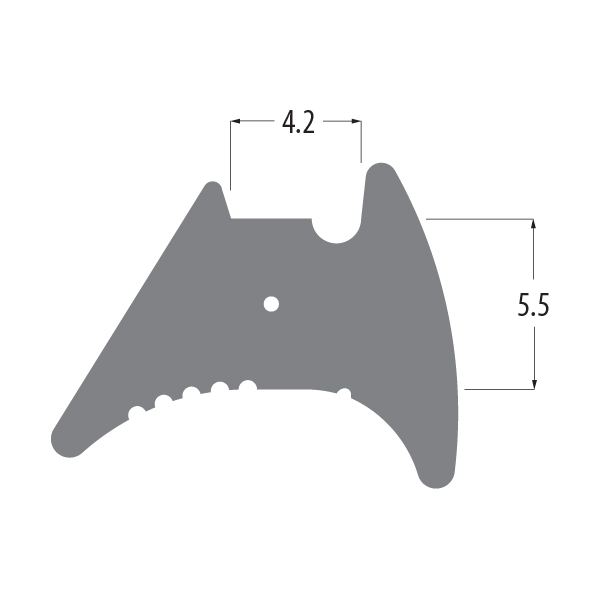
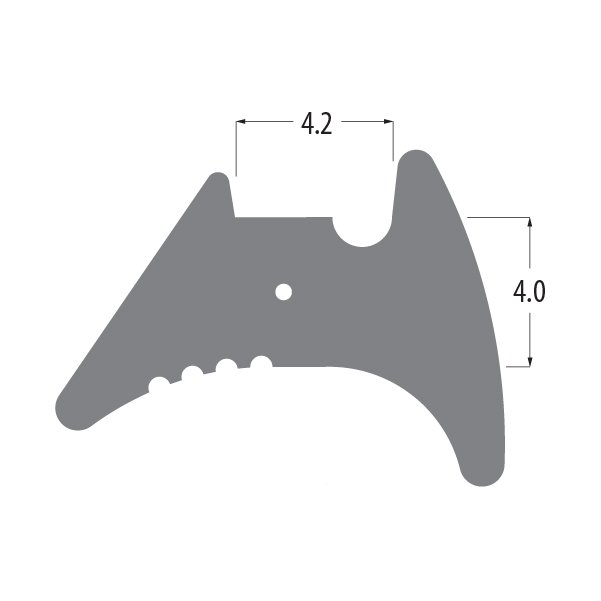
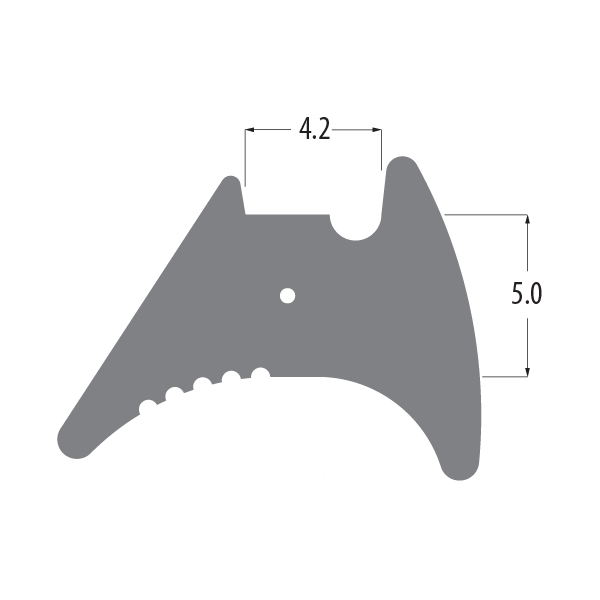
- CHeight. The part that compresses against the glass. This is the right-hand number on our wedge drawings. It needs to be a little bigger than gap A, so the wedge squeezes in tight.
Glass already out? Measure the width of the channel, take off the thickness of the glass and halve it. A 30 mm channel with 24 mm glass leaves 3 mm each side.
Too thick and it puts pressure on the glass; too thin and it will not hold the glass tight.
U-channel
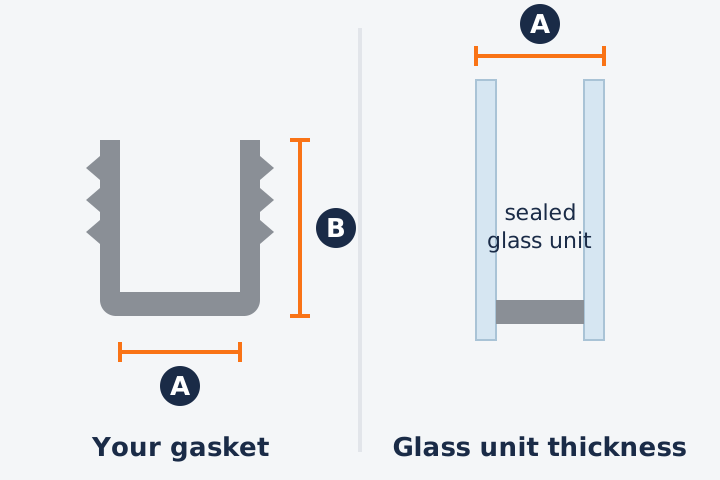
- AInside width. This matches the thickness of your sealed glass unit.
- BHeight. The height of the sides of the U.
Measure a piece that has not been squashed. Take it from a corner or the hinge side, where it has had the least pressure, and use callipers or a steel rule that starts at 0 right at its end. If two profiles are within a millimetre of each other, a sample pack will settle it for a few pounds.
Match your profile
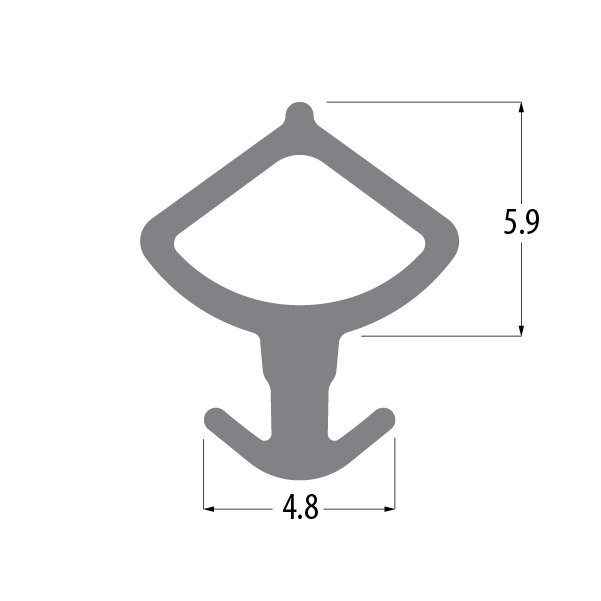
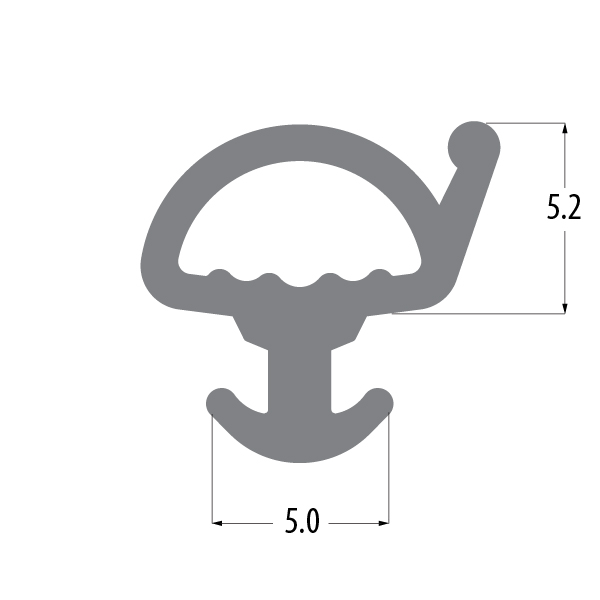
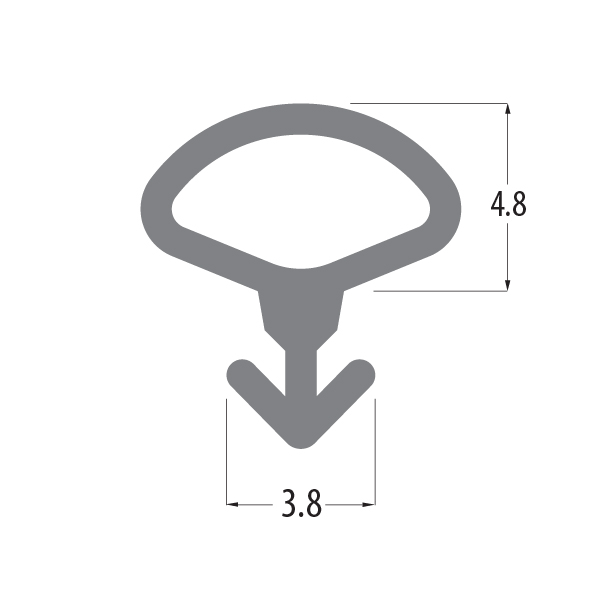
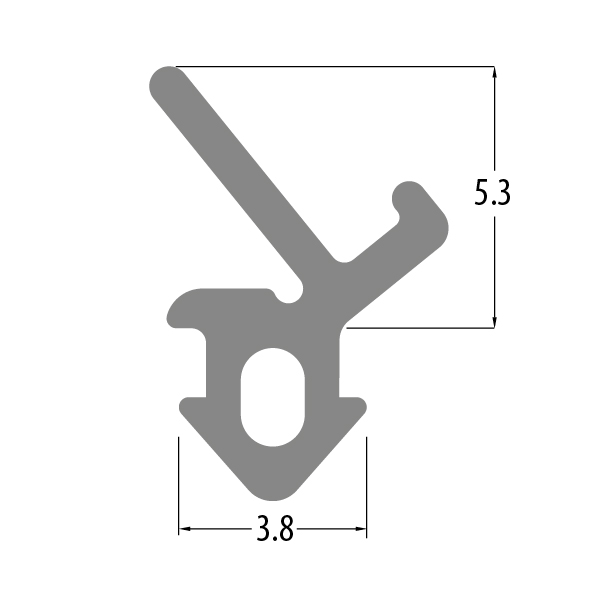
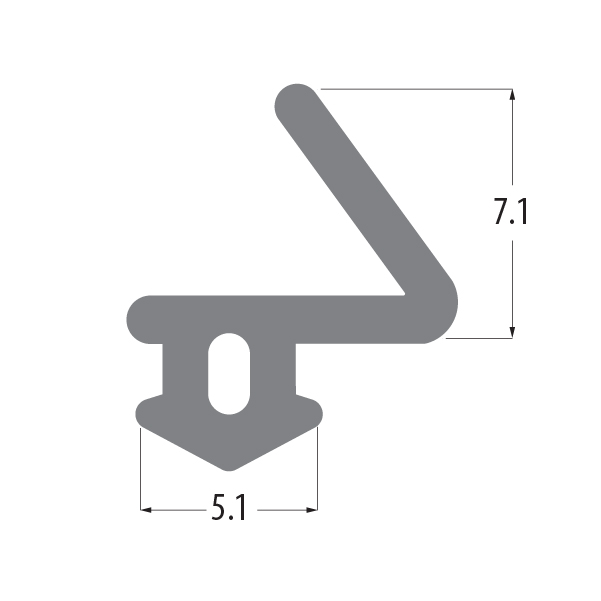
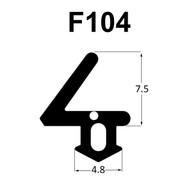
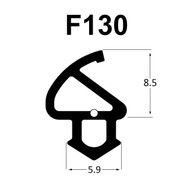
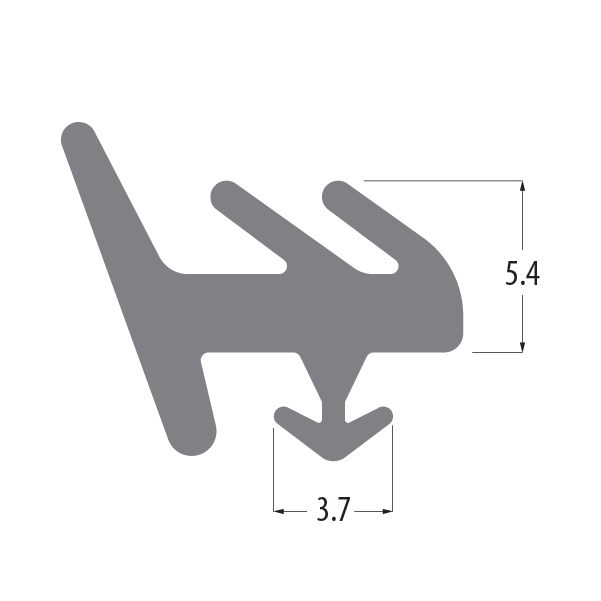
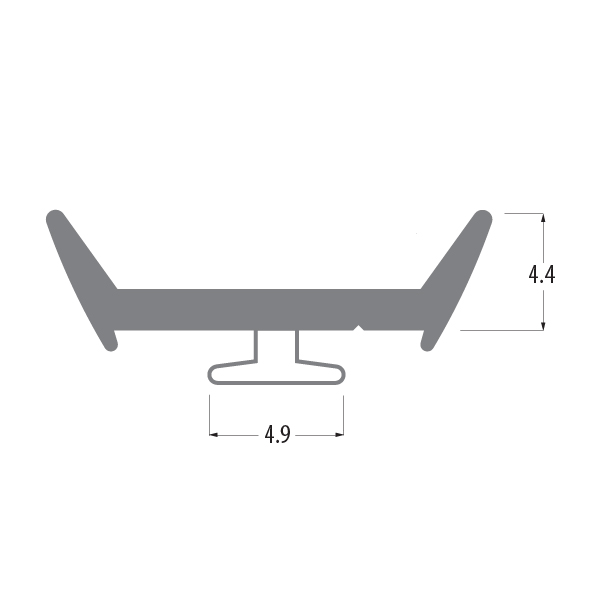
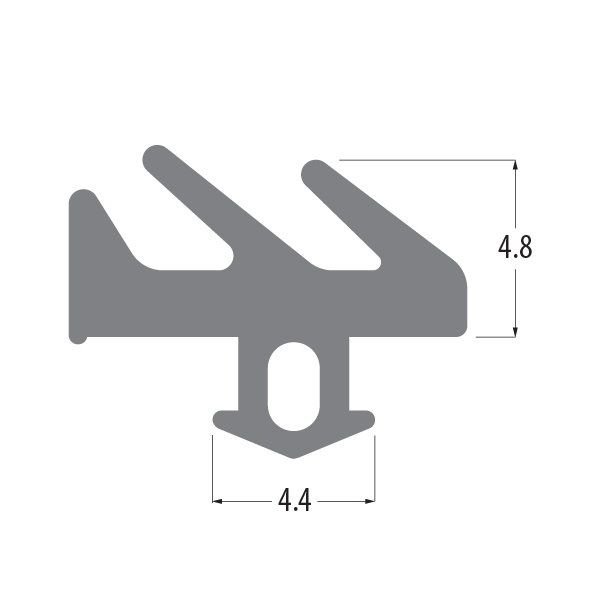
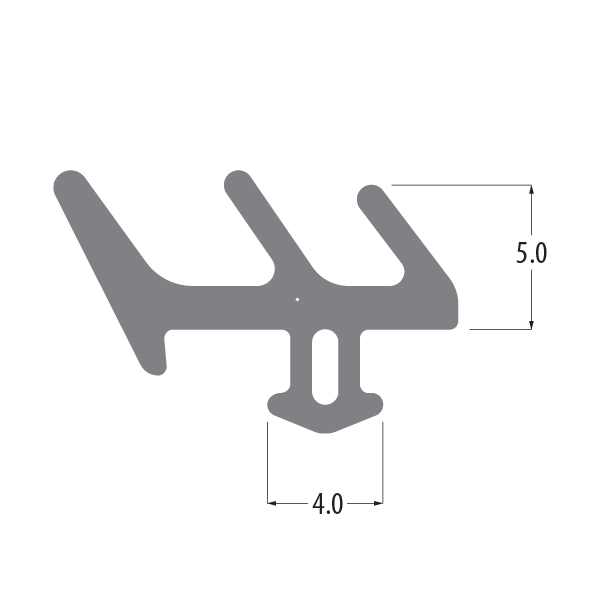
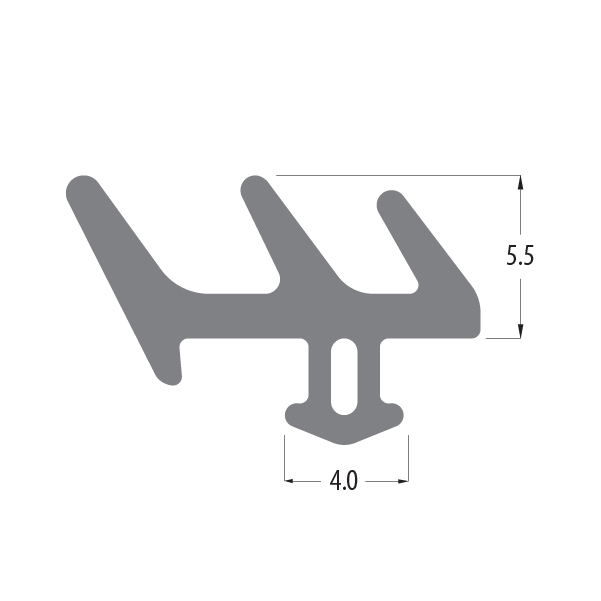
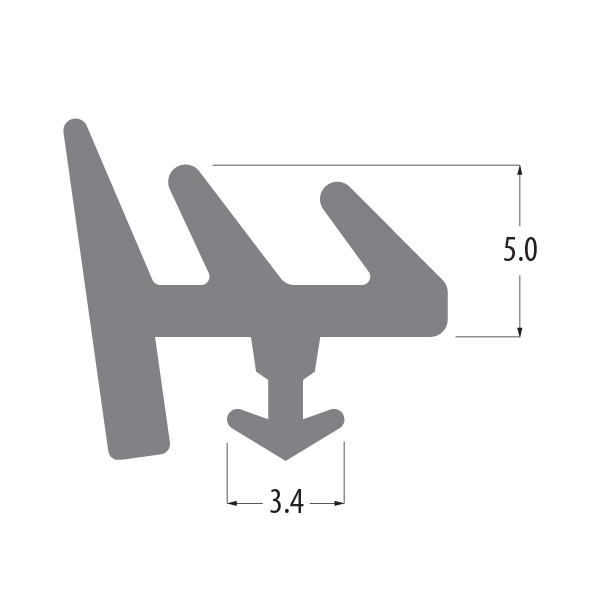
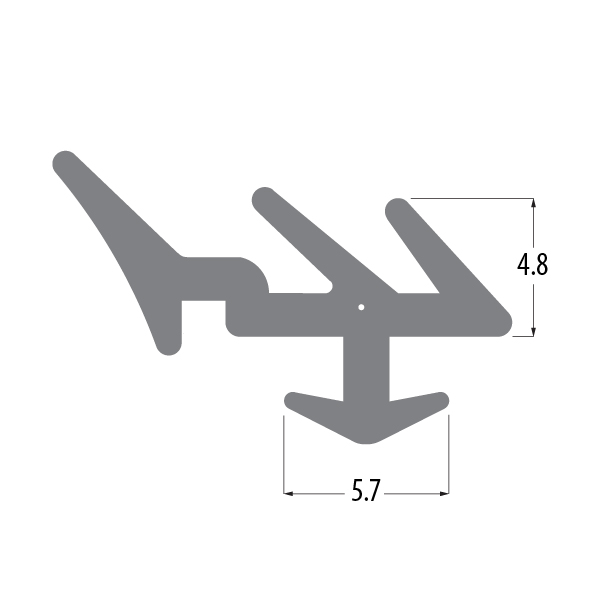
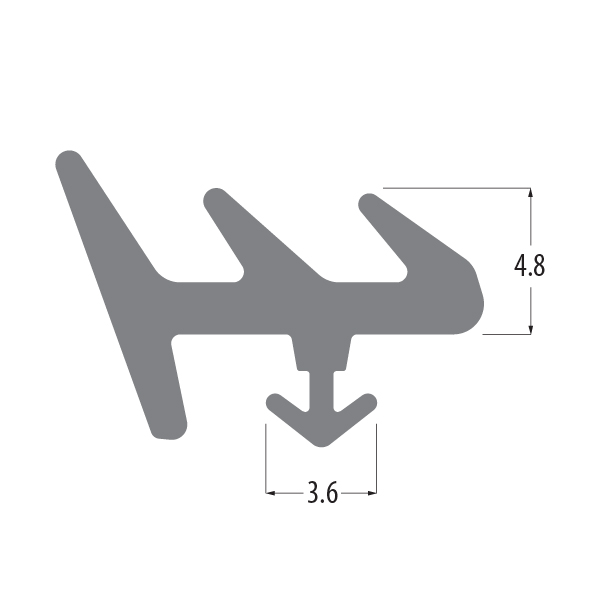
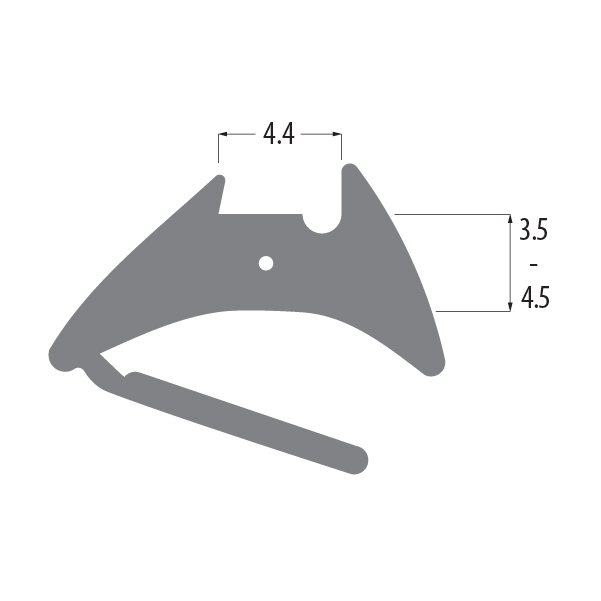
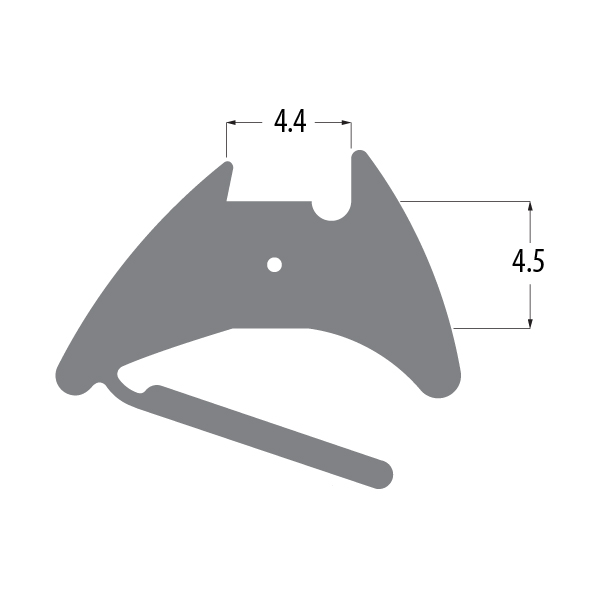
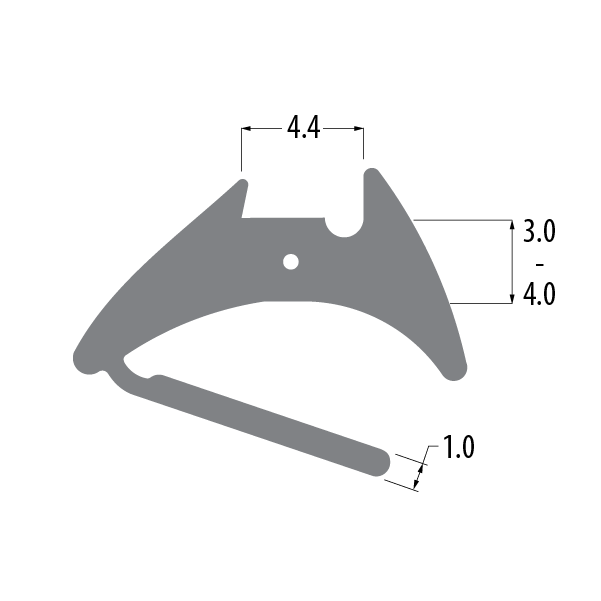
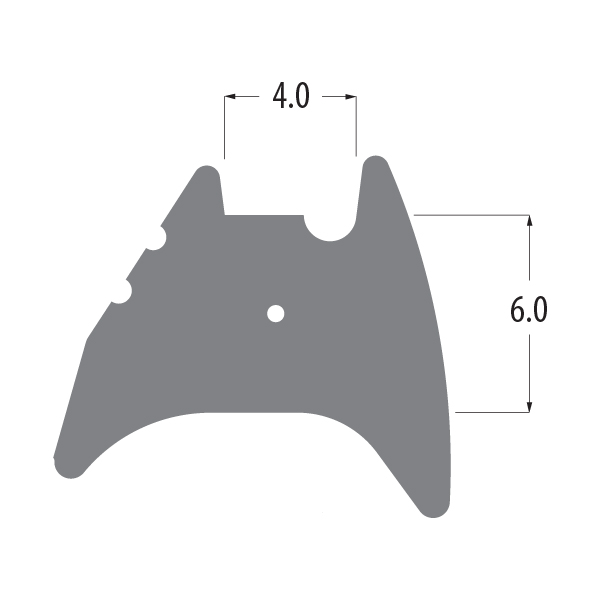
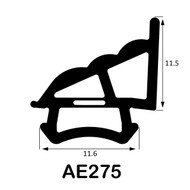
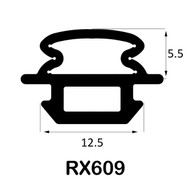
Our gaskets, grouped by type. Find the drawing that matches your piece and tap it to order.
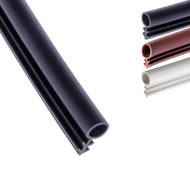
Bubble gaskets
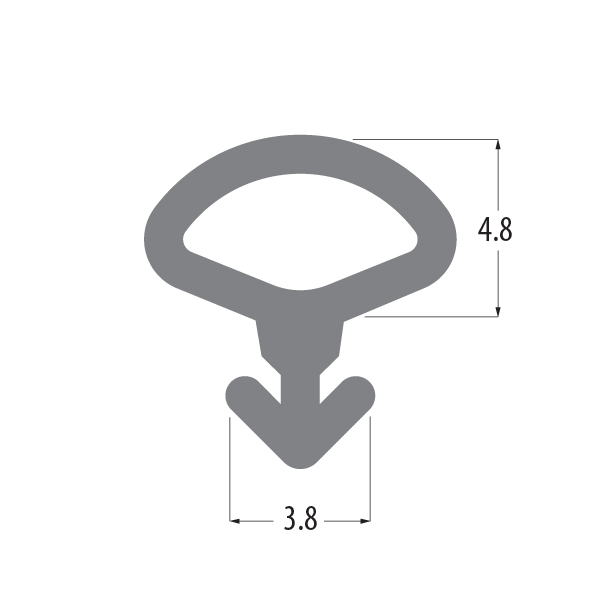
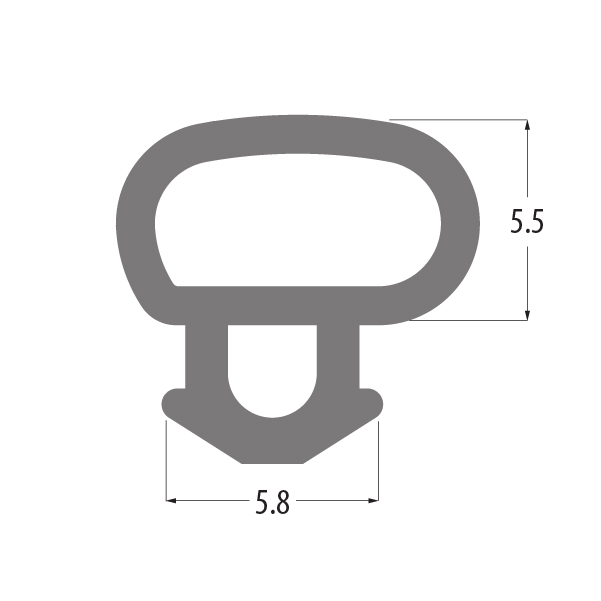
Hollow, rounded seals on a leg. Weather seal between the opening part and the frame.
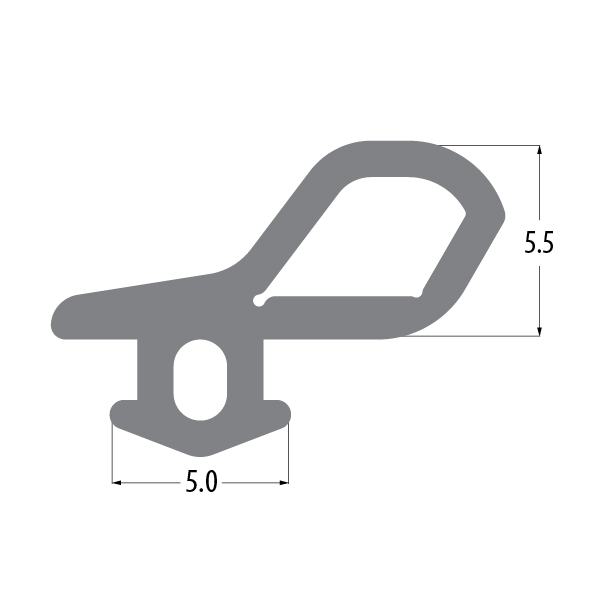
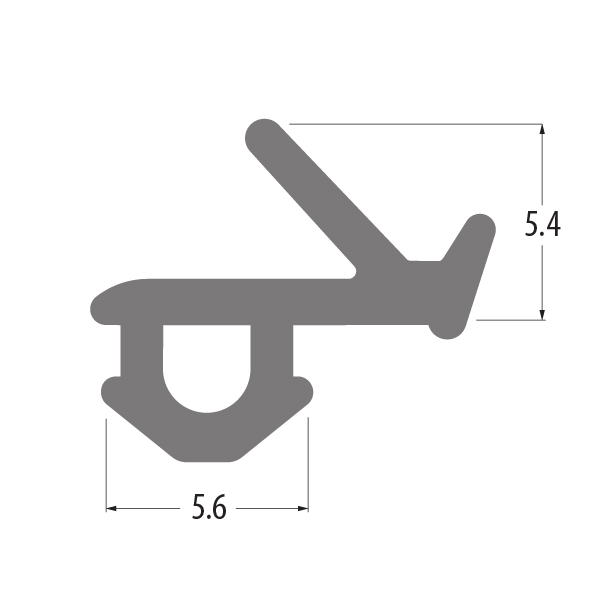
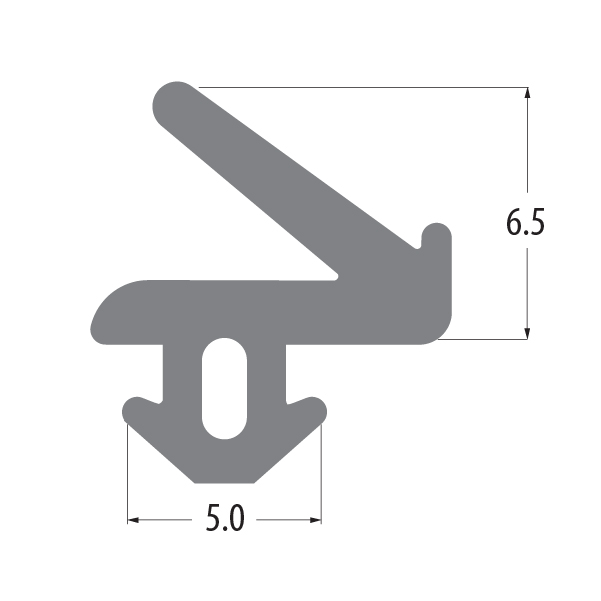
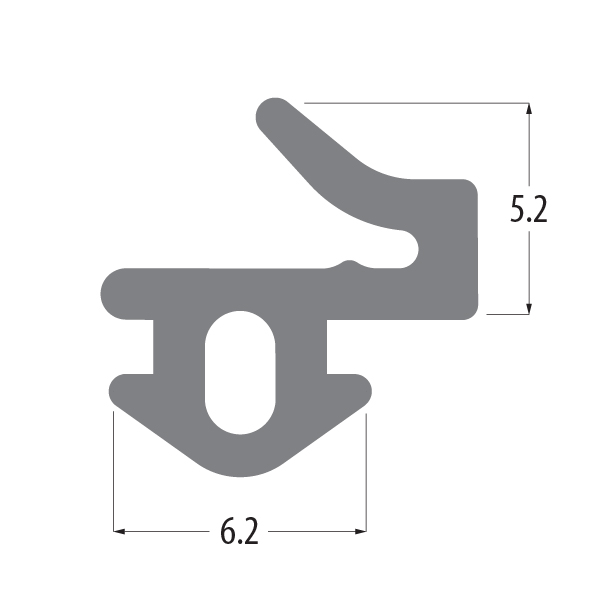
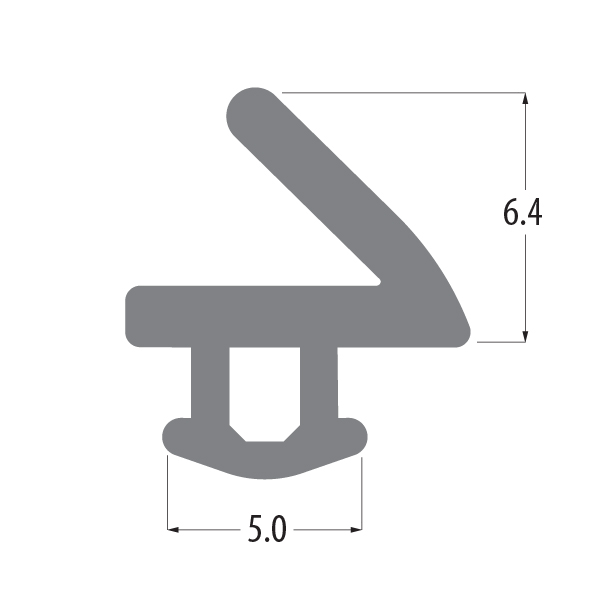
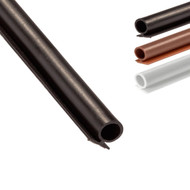
Flipper gaskets
A thin fin or lip that bends over as the window closes.
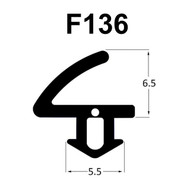
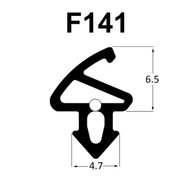
E gaskets (fir tree)
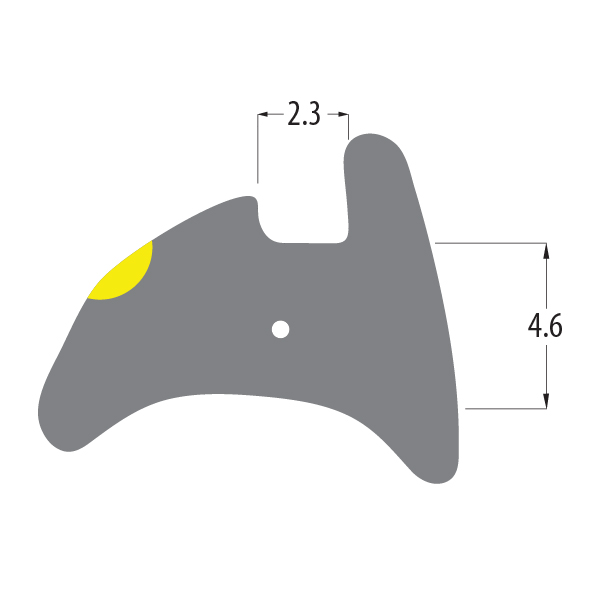
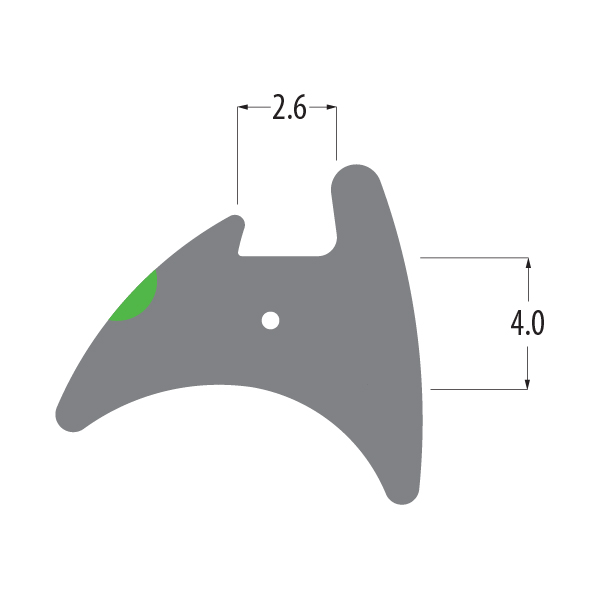
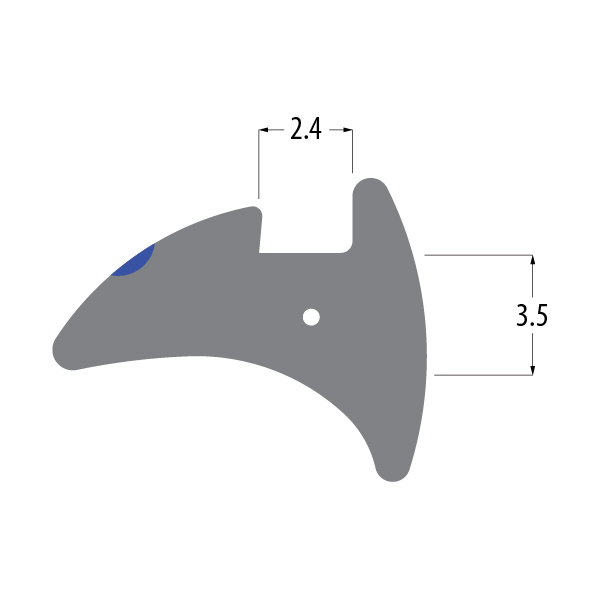
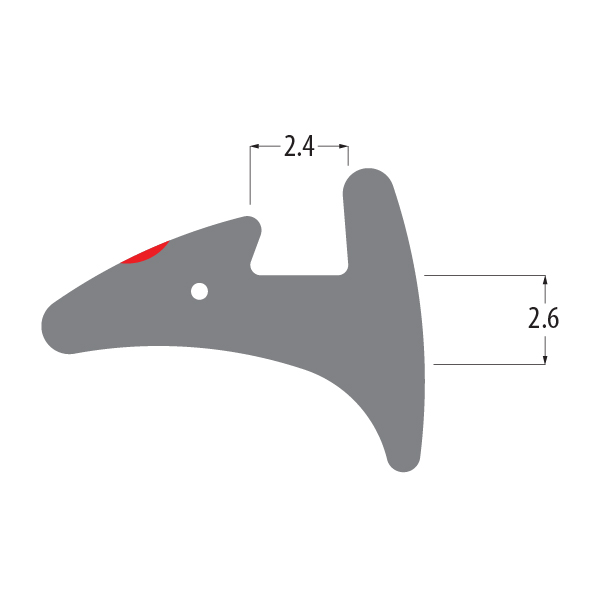
Flat face against the glass with a ribbed leg that pushes into a groove in the frame or glazing bead. A wedge gasket usually seals the other side.
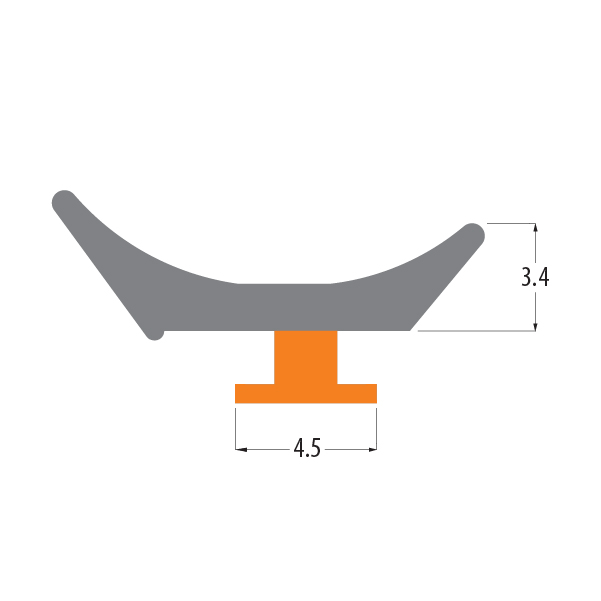
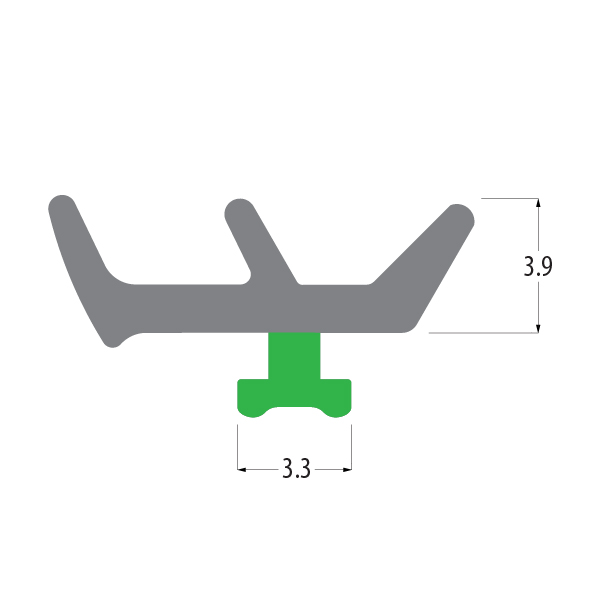
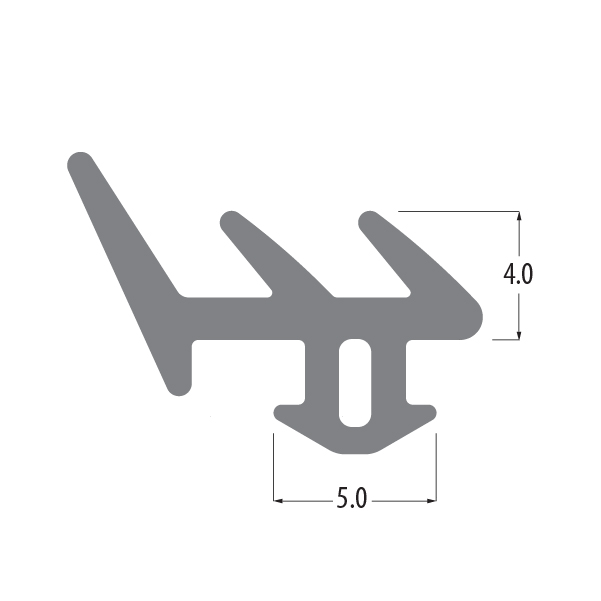
Wedge gaskets (Reddiglaze)
The standard glazing wedge, pushed in between the glass and the frame or glazing bead.
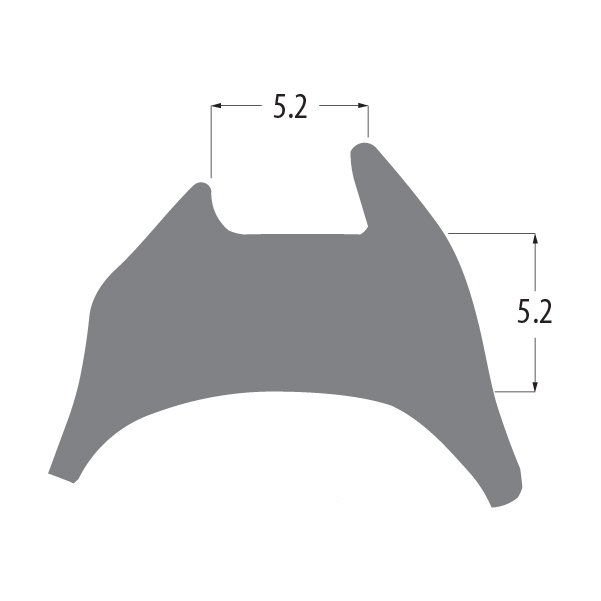
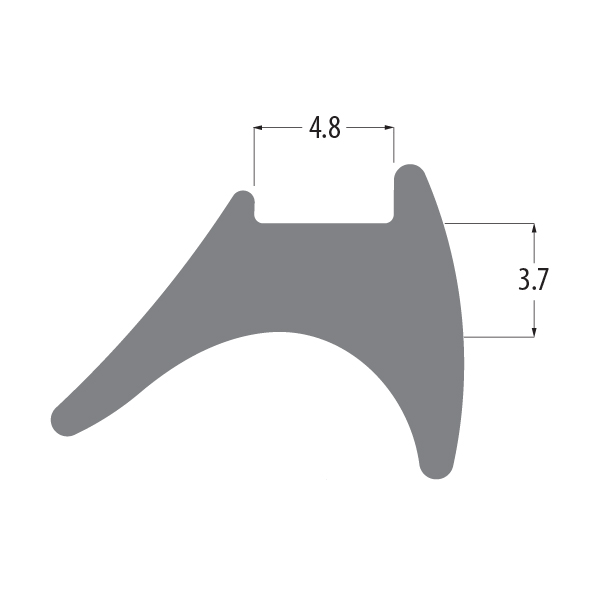
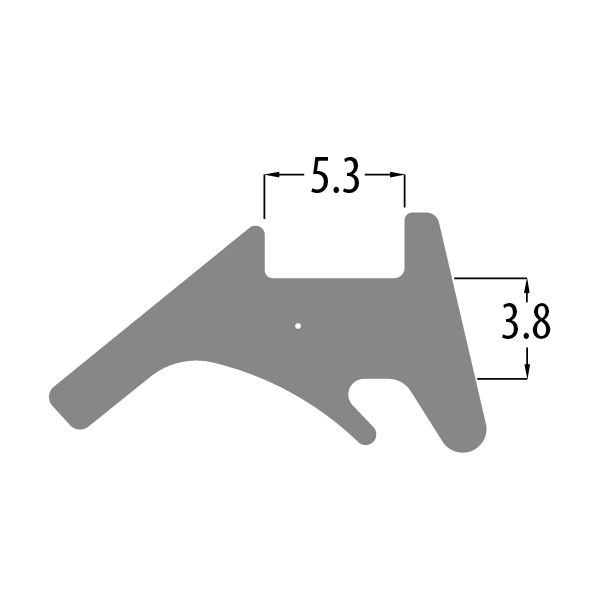
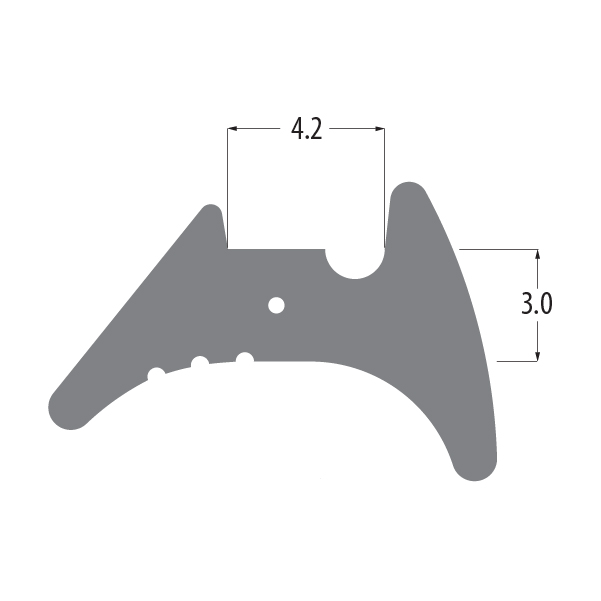
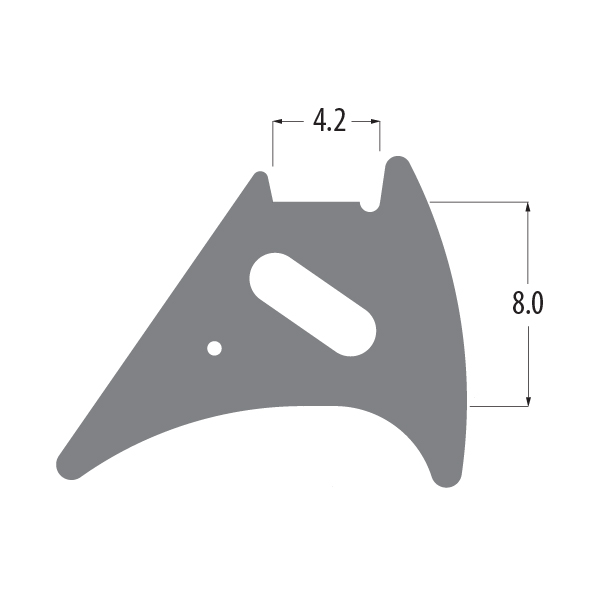
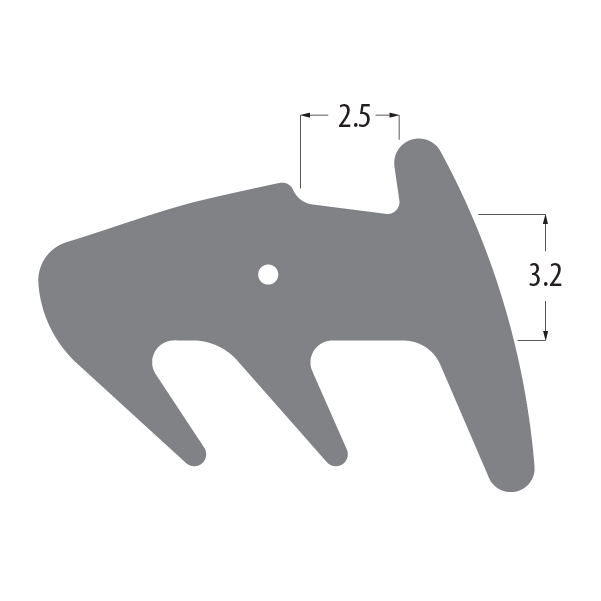
Corded wedge gaskets (Reddicord)
Wedge gaskets with a cord inside that stops them stretching, so they keep their length once fitted.
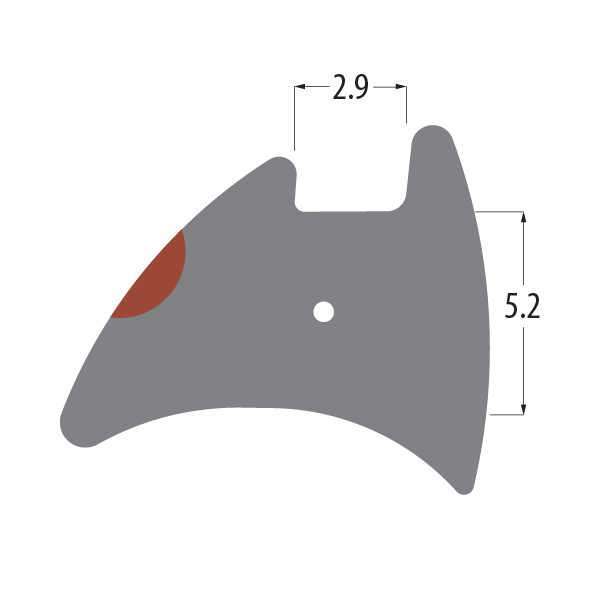
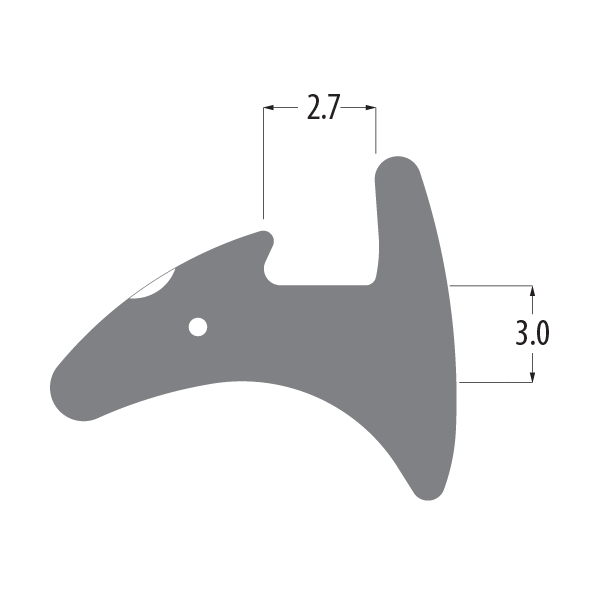
Tear-off wedge gaskets
Wedge gaskets with an extra part you can tear off if the fit is too tight.
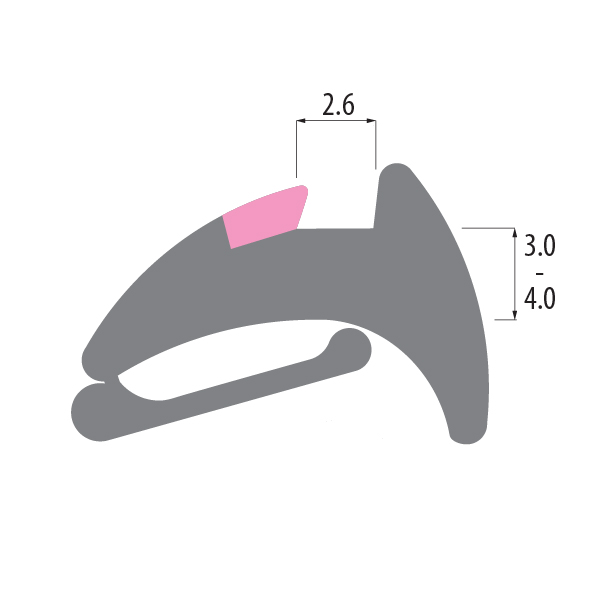
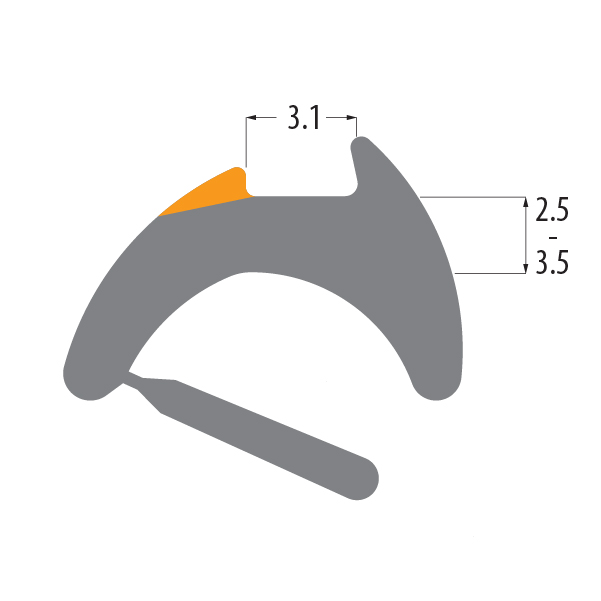
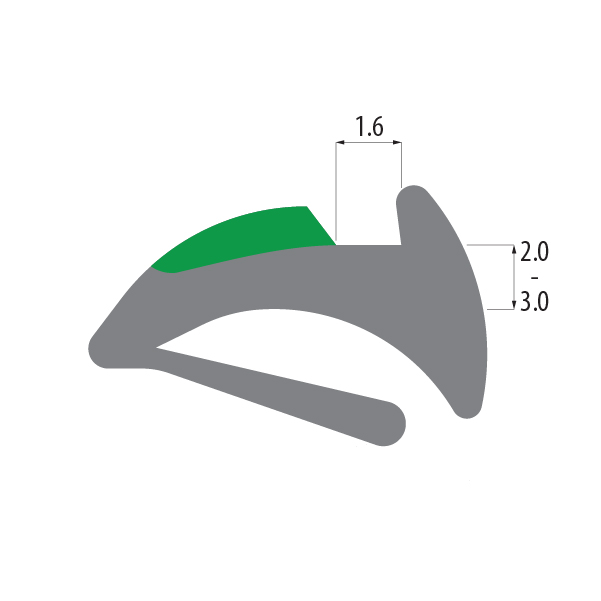
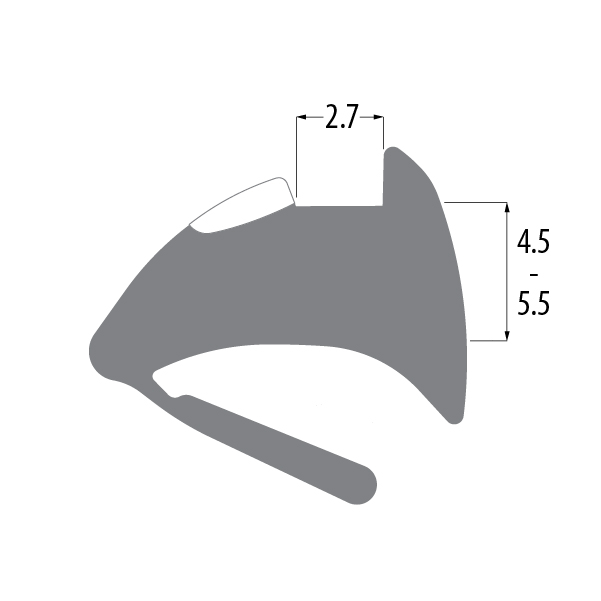
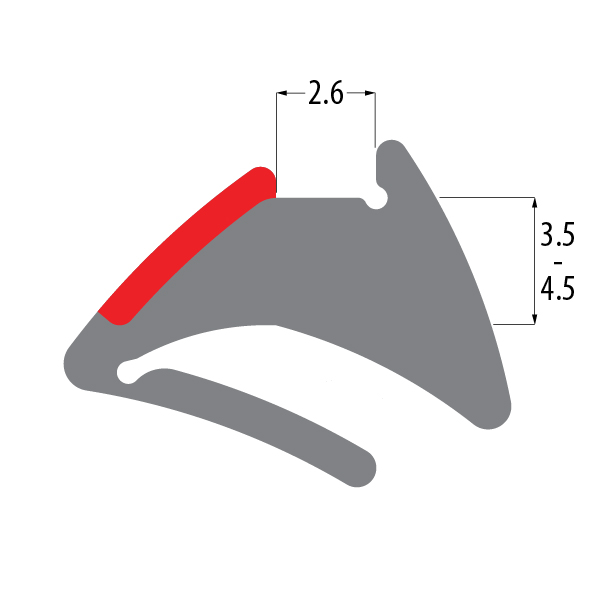
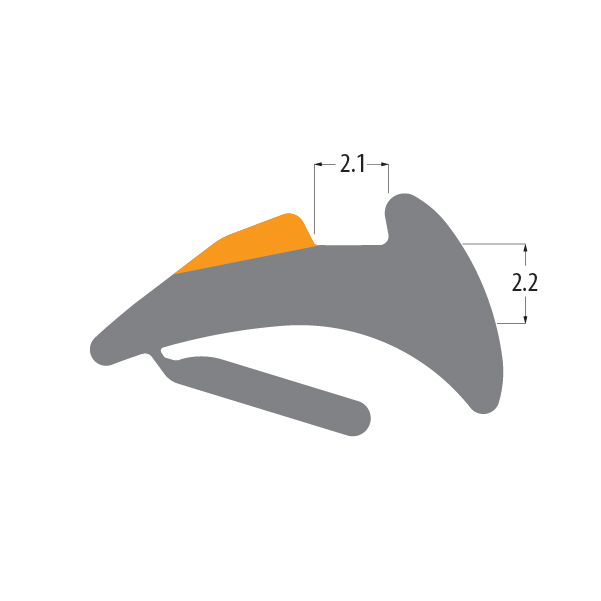
Incremental wedge gaskets
Wedge gaskets that push in between the glass and the frame. Compare the drawings with your piece.
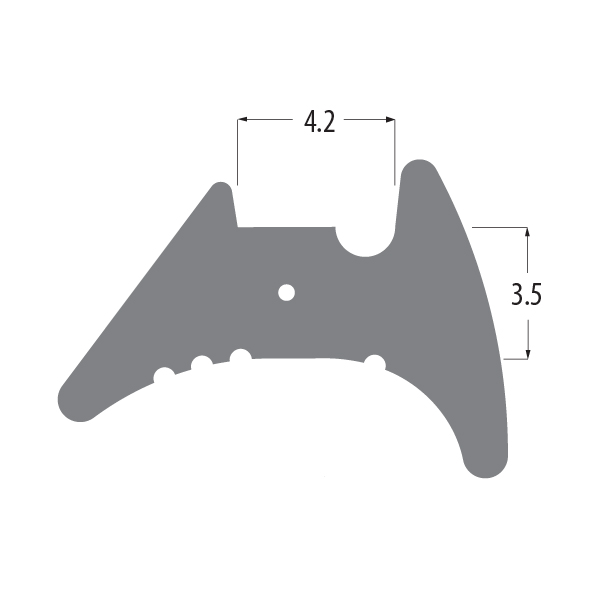
Reddilock wedge gaskets
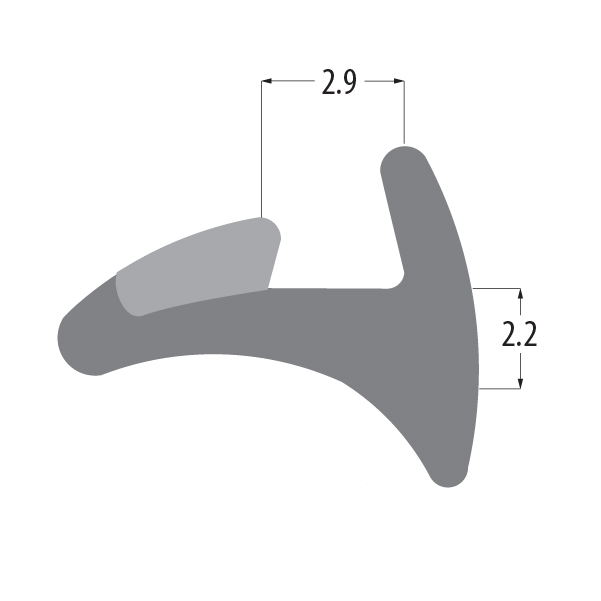
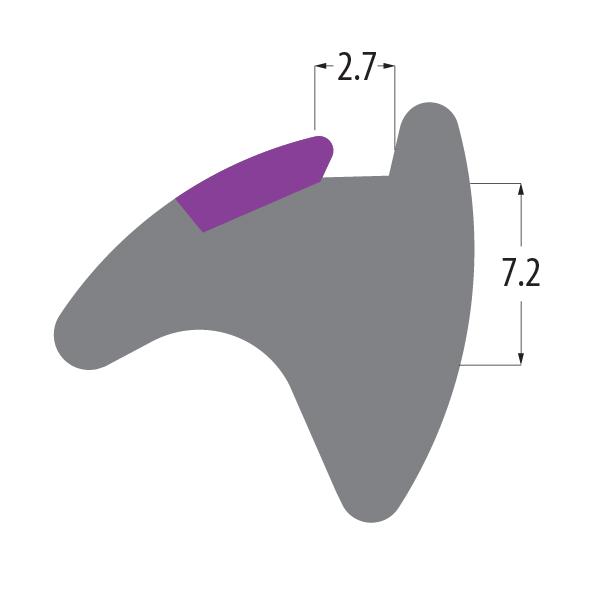
Locking wedge gaskets with a harder section that locks the wedge into the glazing gap.
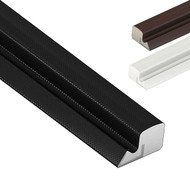
U-channel gasket
Wraps round the edge of the glass on sliding patio doors.
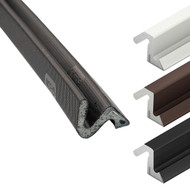
Q-Lon, Aquamac and timber seals
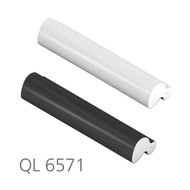
Q-Lon foam seals for some uPVC and wooden windows and doors, plus seals made for wooden frames.
Bi-fold door gaskets
Made for specific bi-fold door systems: check the system name on your door.
How much do I need?
Working out the length
- Measure all the way round each opening part (or each pane, for glazing gaskets) and add the totals together.
- Add a little extra for the corners and for trimming the join.
- Our gaskets are sold by the metre and sent as one continuous length, so you can cut it to suit. The minimum order is 6 metres.
- The more metres you buy, the lower the price per metre: the price breaks are shown on each product page.
Common mistakes
- Matching by how the old seal looks while it is still fitted.
- Measuring a squashed or shrunk piece instead of checking the groove.
- Mixing up the weather seal and the glazing gasket: they are different profiles.
- Swapping a flipper for a bubble (or the other way round) to "make it fit".
- Stretching the gasket as you fit it: it shrinks back and leaves gaps at the corners.
Try a sample pack first
Each pack has a selection of short, numbered samples and an identification sheet, so you can push them into your groove and order the one that fits.
Send us a photo and we will match it
Two clear photos is usually all we need:
- The cut end of the gasket, straight on
- The gasket side-on next to a ruler, plus the empty groove